Posted on

Coconut Quinoa & Broccoli Bowl with Ginger-Lemon Dressing

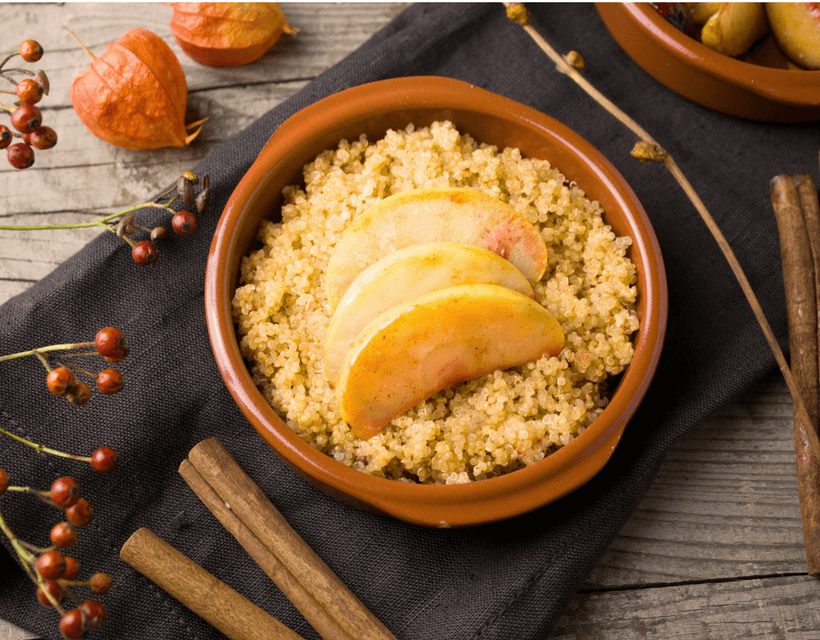
Here’s a wonderful recipe that will not only take the chill out of spring, but it also is good for your gut  … which makes it good for your immune system.

Check out all these gut-loving, immune-boosting ingredients: 

  • Broccoli and snow peas — green vegetables are the source of a chemical signal that is important to a fully functioning immune system. They do this by ensuring that immune cells in the gut and the skin known as intra-epithelial lymphocytes (IELs) function properly.
  • Coconut milk and flakes — Coconut contains lauric acid that is known for its antiseptic properties. It assists the body in fighting infections caused by bacteria, viruses, and fungi.
  • Quinoa is a complete protein and is critical for immune function.
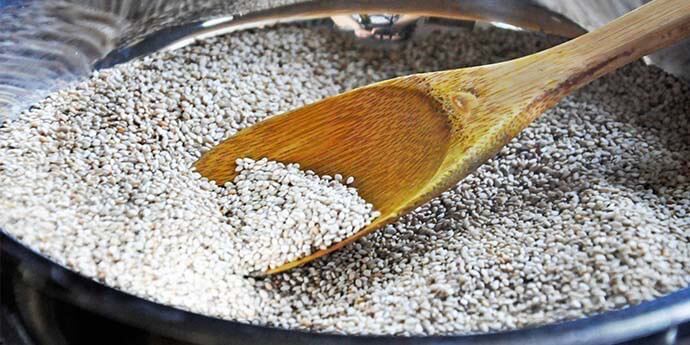
  • Sesame seeds contain iron, zinc, vitamin B6, vitamin E, selenium and many more which support the functioning of the immune system.
  • Ginger has powerful anti-bacterial, anti-viral and anti-inflammatory compounds that keep rhinoviruses from binding to cells in the mucus membranes.

Enjoy this easy-to-make crowd-pleaser!

Ingredients:

For the quinoa and broccoli bowl:

  • 3/4 cup quinoa
  • 1 1/2 cups full-fat coconut milk
  • 1 pinch sea salt
  • 1/2 head broccoli florets
  • 1/2 cup snow peas, thinly sliced
  • 1 spring onion, thinly sliced
  • 1/4 cup large coconut flakes, toasted
  • 1 tablespoon black sesame seeds

For the dressing:

  • Zest of 1 lemon
  • one 2-inch knob fresh ginger, peeled and sliced
  • 1 teaspoon honey
  • 1 lime, juiced
  • 1/4 cup olive oil


Directions:

  1. Rinse the quinoa under cold water for about 30 seconds. In a medium pot, add the rinsed quinoa, coconut milk, and sea salt. Bring to a boil, then cover and simmer for 15 minutes, until quinoa has absorbed most of the liquid. Remove from heat, let sit with lid on for 5 minutes, and then fluff with fork.
  2. Lightly steam the broccoli until just tender and bright green, no more than 5 minutes once the water boils. Then, rinse broccoli under cold water to stop its cooking, and to retain its color and texture.
  3. Place the coconut quinoa in 4 bowls. Add the warm broccoli, and then top it with snow peas, spring onion, toasted coconut flakes, and sesame seeds.
  4. To make the dressing, place lemon zest, fresh ginger, honey, lime juice, and oil in a small blender and combine until smooth. A If needed, add a teaspoon or two of water to reach the right consistency.
  5. Drizzle the dressing over your  bowl.


Meet Melissa: Melissa Rapoport is the Manager of Health Coaching and Lifestyle Programming at Blum Center for Health in Rye Brook, NY. She combines her graduate work in Developmental Psychology with her education in nutrition, health and coaching to create highly individualized programs that result in lifetime change. A contributing author to three international bestselling books, Melissa’s greatest joy is her relationship with her two daughters. To learn more about Melissa’s coaching practice at Blum Center for Health, click here.

Posted on

{Recipe} Dr. Yee’s Fire Cider Brew

First, hand sanitizer became liquid gold. Then toilet paper, another commodity whose worth has skyrocketed all in an effort for people to feel safe and well-stocked.  Now, herbal and nutraceutical solutions for improved immunity have also flown off the shelves of health food stores. Finding them online has proven to be just as difficult.  Everything is BACKORDERED.  

In every single conversation I’ve had with patients these past few weeks, everyone wants to know what they can do to improve how well their immune system can prevent infection.   Recently, Dr Susan Blum had given her tips to boost immunity, and it’s a great start. If you are having a hard time procuring any of these products, read on for what I do personally to boost my immune system. 

For years, I have been taking a simple regimen of medicinal mushrooms at high doses. This year, long before coronavirus became the prevailing thought in each and everyone minds, I added a tablespoon of fire brewed apple cider vinegar to my regimen each evening and I have to say it has been extremely effective.  Granted, this is a “N-of-1” anecdotal report, but I feel quite strongly about it.  

Apple cider vinegar has been used as one of most common home remedies for a wide variety of health conditions from reflux to yeast infections to sunburns.  There is some pre-clinical data showing its efficacy as an anti-viral, anti-fungal and anti-bacterial agent but there is no hard clinical proof here. Typically I don’t recommend things without some level of evidence but here we are – empty shelves and backordered items.  It’s been working for me and its dirt cheap! 

You can find locally crafted concoctions of Fire Cider in health food stores and farmers markets but I like to make it at home.  Try this recipe while you are home social distancing and in a few short weeks you’ll have your own Fire Cider brew to boost your immunity as we get back to normalcy.  Wishing you good health! 

Recipe: Fire Cider Brew

(adapted from Rosemary Gladstar’s recipe)

Ingredients:

  • ½ cup grated fresh horseradish root
  • ½ cup or more fresh chopped onions
  • ¼ cup or more chopped garlic
  • ¼ cup or more grated ginger
  • 1 Tbs Turmeric 
  • 2-3 Tbs Honey
  • Chopped fresh or dried cayenne pepper ‘to taste’. Can be whole or powdered. 

Directions: 

  1. Place herbs in a half-gallon canning jar and cover with enough raw unpasteurized apple cider vinegar to cover the herbs by at least three to four inches. Cover tightly with a tight fitting lid.
  2. Place jar in a warm place and let it sit for three to four weeks. Best to shake every day.  
  3. After three to four weeks, strain out the herbs, and reserve the liquid.
  4. Add honey ‘to taste’. Warm the honey first so it mixes in well. 
  5. Rebottle and enjoy! Fire Cider will keep for several months unrefrigerated if stored in a cool pantry. 
Posted on

Blueberry Lime Margarita Anyone? It’s our New Summer Go-To!

It’s so easy to overindulge in alcoholic drinks in the summer. Who doesn’t love cocktails with friends when it’s balmy outside and light well into the evening. This summer, why not drink to your health? It’s easy to reduce your alcohol consumption by discovering a fav mocktail. Put it in your favorite cocktail glass, add a garnish, and voila, you will have a satisfying non-alcoholic drink. 

Try our Blueberry-Lime Margarita — it’s a breeze to make!  It will give your body ample potassium to help manage fluid and energy balance and loads of health supportive antioxidants-all without the excessive calories and refined carbohydrate of traditional margaritas. The unbelievable flavor will easily satisfy any summer fruity drink craving, too. Cheers!

While we are on the topic of cocktails, here’s a common question: It’s summer and I really want a cocktail, will having one ruin all my hard work? Find out here. 

Blueberry Lime Margarita

Servings: 4

Ingredients

4 cups ice

 2 cups organic frozen blueberries

1/2 cup organic unsweetened pomegranate juice

1/2 cup seltzer

1/2 cup fresh organic lime juice

4 organic lime wedges, for garnish

sea salt, for garnish (optional)


Preparation:

  •  In a blender, place the ice, blueberries, juice, seltzer, and lime juice
  • Blend until smooth
  • If salting the rim of the margarita glasses, rub a lime wedge around the 
  • rims of 4 glasses.  
  • Dip rims lightly in sea salt
  • Pour Margarita into glasses and place lime wedges on the rim of 
  • the glasses
  • Serve and enjoy! 


Meet Melissa: Melissa Rapoport is the Manager of Health Coaching and Lifestyle Programming at Blum Center for Health in Rye Brook, NY. She combines her graduate work in Developmental Psychology with her education in nutrition, health and coaching to create highly individualized programs that result in lifetime change. A contributing author to three international bestselling books, Melissa’s greatest joy is her relationship with her two daughters. To learn more about Melissa’s coaching practice at Blum Center for Health, click here.

Posted on

Orange Ginger Mashed Butternut Squash

This comforting recipe is a great change of pace for a healthy, yet flavorful side dish. The citrus adds brightness while warming ginger helps to soothe the digestive tract.

Serves 4

Ingredients

1 butternut squash (approximately 2-2½ pounds), peeled and cut into large chunks

¼ cup pure maple syrup

2 teaspoons orange zest

¼ cup plus 2 tablespoons fresh orange juice

¾ teaspoon fresh lemon juice

1 teaspoon freshly grated ginger

½ teaspoon ground cinnamon

¼ cup coconut butter (manna) or coconut oil

Sea salt, to taste


Preparation

  1. Place butternut squash in a large pot. Cover with water and boil for 20 minutes or until tender. Drain thoroughly and set aside.
  2. Combine the maple syrup, orange zest, orange juice, lemon juice, ginger, cinnamon, and coconut butter or oil in a saucepan. Bring the mixture to a quick boil over high heat, being careful not to burn. Quickly lower to a simmer and cook about 2-3 minutes or until syrupy. Remove pan from heat.
  3. Place drained butternut squash in a large bowl and pour orange mixture over the top. Mash together with a potato masher and season with salt. If a creamier texture is desired, transfer mixture to a food processor and pulse until smooth.


Cook’s notes: Substitute peeled sweet potatoes for butternut squash, if desired.


BIO: Lisa Markley, MS, RDN is a dietitian, culinary nutrition expert, and co-author of the best-selling The Essential Thyroid Cookbook: Over 100 Nourishing Recipes for Thriving with Hypothyroidism and Hashimoto’sAs a seasoned culinary educator and recipe developer, Lisa translates nutrition science to the plate using health-supportive ingredients prepared with peak flavor, seasonality, and nutrient density in mind. Learn more at www.thyroidcookbook.com.


Recipe shared with permission from The Essential Thyroid Cookbook by Lisa Markley and Jill Grunewald, published by Blue Wheel Press. Recipes ©2017 by Lisa Markley, MS, RDN. Food photography ©2016 by Kenny Johnson. www.thyroidcookbook.com.

Posted on

Get a Taste of Fall with Butternut Squash Risotto

Take a stroll through a Farmers Market you will likely come across butternut squash at every turn. Take advantage of this seasonal powerhouse — not only is it comforting and delicious on a brisk Autumn day, it boasts a rich concentration of nutrients, dietary fiber, zinc, protein, folate and potassium.

In fact, beta-carotene, the antioxidant that gives butternut squash its beautiful orange color, along with vitamins A and C, support the natural function of the immune system, helping to prevent infections. Perhaps this is Mother Nature’s way of taking care of us going into cold and flu season!

Here is one of our favorite Fall recipes — creamy, plant-based, with just the right amount of crunch from toasted pumpkin seeds. We’re sure this will become one of your Autumn go-to’s.


Fall Butternut Squash Risotto

Serves 4-6

Ingredients:

4 Tbsp. olive oil (divided)

2 cups diced butternut squash (or other winter squash)

1½ cups quartered cremini mushrooms

½ cup diced red onion

1 cup Arborio rice

4-5 cups vegetable stock, warmed in sauce pan

½ tsp. salt

freshly ground black pepper (to taste)

¼ cup toasted pumpkin seeds

¼ cup chopped parsley (garnish)


Preheat oven to 375 degrees F. Line two baking sheets with parchment paper.

In a large bowl, combine the diced squash, 1 Tbsp. olive oil, and a pinch of salt. Spread the squash onto one of the baking sheets. Repeat the process with the mushrooms.

Place the trays into the oven to roast for 15-20 minutes (mushrooms) and 25-30 minutes (squash).

Meanwhile, rinse the rice in a fine mesh strainer under cold water. Drain well.

Heat 1 Tbsp. olive oil in a heavy-bottomed pot over medium heat. Add the onion and sauté for 5-6 minutes, or until translucent. Add the rice and stir to coat, cooking for one minute longer.

Add one cup of the warm stock and a pinch of salt, stirring constantly until the grain has absorbed all of the liquid. Continue to add the stock in ½ cup increments until the rice is cooked through and the grains are creamy.

Stir in the cooked squash and mushrooms. Season to taste with additional salt and pepper, as desired.

Garnish with pumpkin seeds and parsley, and serve warm.


Looking for more anti-inflammatory recipes? Check out our BlumKitchen Recipe Book. Our recipes are designed to reduce inflammation, support your thyroid, improve your liver’s detoxifciation function and heal your gut. Start cooking the Blum way today! Show Me Now


Meet Melissa: Melissa Rapoport is the Manager of Health Coaching and Lifestyle Programming at Blum Center for Health in Rye Brook, NY. She combines her graduate work in Developmental Psychology with her education in nutrition, health and coaching to create highly individualized programs that result in lifetime change. A contributing author to three international bestselling books, Melissa’s greatest joy is her relationship with her two daughters.

Posted on

Summer Green Smoothie Instead of Coffee? You Bet!

Like most of you, I really love my morning coffee (my morning fuel of choice is espresso).  The nespresso machine in my kitchen has been an attractive nuisance since I bought it, making it way too easy to have one or two shots as I am revving up to start my day.  As August rolled around, I decided to do an experiment to see if my espresso was affecting how I felt, good or bad. To do this, I decided to kick the habit, and substitute my espresso for black tea (which also has caffeine), followed by a green smoothie made from contents of my garden. Yummy live food that I whipped up in my Nutrabullet.  And here is what I discovered.

It took a few days to adjust, but by day 3, I noticed that I was sleeping deeper and longer.  Since I was having my espresso only very early in the mornings, it shocked me that it had such a dramatic effect on my sleep so many hours later. I always thought that because I wasn’t having caffeine or coffee after 10 am, it wouldn’t make a difference.  Boy was I wrong!

I found myself sleeping later in the mornings and remembering my dreams.  If you are having any sleep issues whatever, I strongly recommend quitting coffee and see what happens!  It has been about 4 weeks now, and I am still sleeping great, feeling more rested in the mornings.

What I Learned About Green Smoothies

I used to be more of a berries-in-the-smoothie girl, but I switched to a more tart, savory drink instead of sweet.  You will see my recipe below. After my live, green, smoothie breakfast, I am zipping to work and buzzing with a better energy than I used to get from espresso!  I decided to write this blog to inspire those of you that read this, to try this experiment. The good news is that you can get greens triple washed and ready to use, making this smoothie super easy to make each morning.  I usually go out to the garden and add fresh parsley, rosemary, basil, or mint, in addition to the kale and spinach. You can customize this to your taste.

Here are the nutrition facts:

Total calories:  265;

Fat: 12.9 grams; Carbs: 34.6 grams; Fiber: 7.2 grams: Sugar: 17 grams; Protein: 11.2 grams

Green Smoothie Recipe:

½ apple, skin on

½ banana

½ cup Baby Kale

½ cup Baby spinach

1 TBL fresh lemon juice

1 TBL fresh lime juice

2 TBL organic Hemp seeds

1 cup cold filtered water

Optional:  A twig of rosemary and a handful parsley from the garden, or other herbs of your choice like a few leaves of mint or basil.

Put all ingredients in the Nutrabullet and enjoy!


Posted on

Try This Hearty Breakfast Cereal for Cool Mornings

As the weather turns cooler you may be wondering how to incorporate a heartier breakfast that’s good for your gut and good for your joints.

Start the day well with a warm and healthy breakfast cereal. A bowl of hot quinoa cereal on a cool morning is one of life’s simple pleasures and incredibly versatile.

You can use different combinations of spices, toppings, and fruits to customize your breakfast.

Think seasonal: Experiment and try adding autumn fruits, such apples, pears and blackberries. Stir in some of your favorite nuts and seeds, including chia or flax seeds — it’s a great to add fiber and protein! And, consider playing with some warming spices, such as ginger or cardamom. You can’t go wrong!

Use our basic recipe as your starting point:

Hot Quinoa Cereal with Fruit & Nuts

3 servings

  • ½ cup quinoa
  • 1 cup water
  • 1 cup non-dairy milk, like almond, coconut or rice milk
  • ½ tsp sea salt
  • ¾ Tbsp maple syrup
  • ¼ tsp ground cinnamon
  • 1 tsp  vanilla extract
  • ¼ cup slivered almond or toasted walnuts
  • Optional: fresh berries, ghee

Directions:

  1. Rinse the quinoa with cold water in a fine mesh strainer and drain.
  2. Put the water, milk and salt in a pot and bring to a boil.  
  3. Stir in the quinoa, turn down the heat to medium low, cover the pot, and simmer gently for 15 minutes, stirring occasionally and adding more milk if needed. The cereal is done when the quinoa is soft and has the consistency of oatmeal.
  4. Remove from the heat and stir in the maple syrup, cinnamon and vanilla.
  5. Transfer to bowls and serve warm or cold with toasted nuts and fresh berries and stir in a teaspoon of ghee if desired.


Meet Melissa: Melissa Rapoport is the Manager of Health Coaching and Lifestyle Programming at Blum Center for Health in Rye Brook, NY. She combines her graduate work in Developmental Psychology with her education in nutrition, health and coaching to create highly individualized programs that result in lifetime change. A contributing author to three international bestselling books, Melissa’s greatest joy is her relationship with her two daughters.


Posted on

Make Ghee in 1,2,3!

Homemade Ghee

Ghee is another name for clarified butter and is a traditional healing food in India. It is made by heating butter until it liquefies. The milk solids are removed, making it suitable for those who are dairy sensitive. You can also buy it already made in health food stores and Indian markets or you can try our ghee recipe below.  Traditionally, ghee has been used for ulcers, constipation, would healing and soothing the digestive track.

To learn more about the benefits of ghee check out: Fall in Love with Ghee: Healthy, Dairy-Free and Tastier Then Butter

Ghee Recipe:

1 pound unsalted organic butter

1. In a medium saucepan, heat butter on medium heat.

2. The butter will melt and then come to a boil. You will hear the butter snapping and crackling as it boils.

3. It will begin to foam at the top. Remove the foam with a spoon and discard.

4. After about 15-20 minutes you will hear the “voice” of the ghee change. It will get quieter. You’ll see the oil become clear rather than cloudy.

5. Take it off the heat and strain it through cheesecloth or use a mental coffee filter and filter paper. You can wait 15 minutes or do this immediately. It’s hot, so be careful.

6. Put into a ceramic, glass, or stone bowl and cover. This ghee will last for about a year unrefrigerated.

Reprinted with permission from Liz Lipski, PhD, CCN

This recipe can be found in Dr. Susan Blum’s groundbreaking book, The Immune System Recovery Plan (LINK TO BOOK). It is her 4-step plan to achieving optimal health and features 40 delicious recipes.  Check it out HERE.

Posted on

Fall in Love with Ghee: Healthy, Dairy-Free & Tastier Than Butter

Ghee Jar

Have you tried Ghee? It’s creamy, it’s rich, it’s delicious! Ghee is clarified butter, the pure milk fat that is rendered by separating the milk solids and water from the butterfat. It’s made by melting butter and skimming the fat off the top.

Ghee has been used in Indian Ayurvedic cooking for thousands of years. And, just as we at Blum Digital, LLC believe that Food is Medicine, Ghee in Indian culture is seen as an aid for digestion, ulcers, constipation, and the promotion of healthy eyes and skin. It can be found in Indian beauty creams and is used to treat skin conditions.

“Ghee contains butyrate a short chain fatty acid found in the gut that is incredibly beneficial not only to the gut but to the entire body,” explains Mary Gocke, Director of Nutrition at Blum Digital, LLC. “Cutting-edge research suggests, among many things, butyrate can be used in the prevention and treatment of cancer. There are very few food sources of butyrate, Ghee is one of them.”

You can enjoy ghee in any way you would butter. From cooking to spreading it on gluten-free bread.

5 Reasons to Make the Switch to Ghee

1. Ghee Helps Strengthen the Digestive Tract — Ghee is high in butyrate, a short-chain fatty acid that reduces inflammation and helps balance the immune cells in your gut. According to Susan Blum, MD, in her book, The Immune System Recovery Plan, Ghee strengthens the intestinal lining, and improves the health of the cells that line the entire digestive tract, including the stomach, colon and small and large intestines. (1)

2. People with Dairy Allergies or Sensitivities Can Enjoy Ghee — Milk is comprised of two proteins — whey and casein. In the process of making ghee, these proteins are removed through skimming and straining, rendering it lactose and casein-free. Those with severe dairy allergies should refrain because ghee is not dairy free, but those with sensitivities or intolerances are usually fine.

3. Ghee Protects the Heart — Researchers found in a rural population of India a significantly lower prevalence of coronary heart disease in men who consumed high amounts of ghee. (2) Other researchers (3,4,5) corroborate these findings and further demonstrate in lab studies that ghee decreases serum cholesterol and triglycerides. They found, in fact, that arachidonic acid, a key inflammatory intermediate in the process of atherosclerosis, was decreased by 65% in serum lipids when ghee was used as the sole source of fat. (3)

4. You Can Cook With Ghee — Ghee has a higher smoke point, higher than nearly any other fat you might cook with — at 486 degrees, it is even higher than coconut oil! Smoke point is important because that is the temperature that an oil begins to degrade and create free radicals – those carcinogenic, unstable molecules that damage cells and cell membranes. Free radicals adversely alter lipids, proteins, and DNA and trigger a number of diseases and are associated with the development of conditions like atherosclerosis and cancer. (6)

5. Ghee Can Help You Lose Weight — Studies demonstrate that Conjugated Linoleic Acid (CLA), an Omega-6 fatty acid that naturally occurs in dairy and beef, has been found to reduce weight gain and decrease fat mass. It also has been shown to enhance immunity while also reducing inflammation. (7) One study, in particular, demonstrated that CLA among overweight adults significantly reduced body fat over 6 months and prevented weight gain during the holiday season. (8)

Ghee can be found in most health food stores as well as many specialty markets. Make sure the container says grass fed or pasture-raised.

Want to make your own? It’s easy! Check out the recipe HERE.

References 

1. Blum, S. (2013). The Immune System Recovery Plan. New York, NY: Scribner.

2. Gutpa R., Prakash H. (1997) Association of dietary ghee intake with coronary heart disease and risk factor prevalence in rural males. J Indian Med Assoc. Mar;95(3):67-9, 83.

3. Sharma, H., Zhang, X., & Dwivedi, C. (2010). The effect of ghee (clarified butter) on serum lipid levels and microsomal lipid peroxidation. Ayu, 31(2), 134–140. http://doi.org/10.4103/0974-8520.72361

4. Kumar, M.V., Sambaiah, K., Lokesh, B.R. (1999) Effect of dietary ghee—the anhydrous milk fat, on blood and liver lipids in rats. The Journal of Nutritional Biochemistry, 10(2), 96-104.

5. Kumar, M.V., Sambaiah K, Lokesh B.R (2000) Hypocholesterolemic effect of anhydrous milk fat ghee is mediated by increasing the secretion of biliary lipids. The Journal of Nutritional Biochemistry, 11(2), 69-75.

6. Lobo, V., Patil, A., Phatak, A., & Chandra, N. (2010). Free radicals, antioxidants and functional foods: Impact on human health. Pharmacognosy Reviews, 4(8), 118–126. http://doi.org/10.4103/0973-7847.70902

7. Pariza, M.W. (2004) Perspective on the safety and effectiveness of conjugated linoleic acid. The American Journal of Clinical Nutrition. 79(6), 1132S-1136S.

8. Watras, A.C., Buchholz, A.C., Close, R.N., Zhang, Z. Schoeller, D.A. (2007) International Journal of Obesity 31, 481-487.

Posted on

Sesame Kelp Gomasio

Gomasio Sesame Recipe

Sesame seeds are excellent for healing the thyroid. To boost its potency, we’ve added the sea vegetable kelp to our gomasio recipe for added minerals and thyroid support!  Try this salty condiment on your raw cruciferous vegetables, or as a garnish on salads, soups, noodles, and other vegetables.

Serves 12 Tablespoons

Ingredients 

  • 1/2 cup, sesame seeds – toasted
  • 1/4 cup, kelp – toasted
  • 1/2 tsp, sea salt with iodine

Directions

  • In a mortar, grind the sesame seeds, kelp, and salt together until well combined, but not into a paste. If you don’t have a mortar and pestle you can blend this in a coffee grinder in two batches.
  • Store in an airtight container.